Friday, April 28, 2006

Continuing My Norwegian Forest Kittens

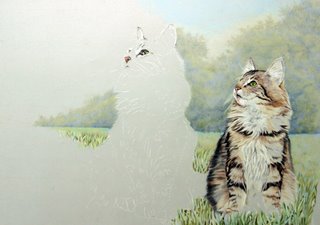
Here are the next stages in the development of my painting.
Once I started working on the second kitten I decided it needed more impact so I added flicks of white acrylic straight from the tube. I found I could retain the very soft fur effect whilst making the highlights in the fur 'pop' a little more.

I also decided that the sky wasn't quite right and removed all the coloured pencil. I then airbrushed a mix of white and cobalt blue acrylic which created a much smoother effect.


In the last photo you can see I have altered the treeline so that it brings the focus back to the larger kitten's eyes. I have also added a small blue butterfly which fit in with the colours I've been using.
I might need to slightly alter the direction of the smaller kitten's gaze as it is looking fractionally too high to be focusing on the butterfly.


Spring Fever

Before I carry on with my kittens demo I thought I would share the Collies enjoying the first nice evening when they were playing in the garden.
The first photo shows Saska proving that even at nine years old and with arthritis in her back legs she can run with the rest of them. She did lie down to watch a couple of minutes later. The second photo shows Jorja and Juno chasing one another, they use the bird bath at one end of the garden to turn and the pond at the other.


The third photo shows Roma taking off in a final jump to reach the winning post first.


You will notice there are no photographs of Clinton taking part in the races, he was indulging in his favourite hobby of watching the sunbeams on the grass. If one dares to land on his paw he can't move until it goes away. The last photo shows him studying his paw with his usual worried look.


Wednesday, April 19, 2006

Two Norwegian Forest Kittens on Drafting Film


After finishing my last NFC, I have decided to do a series of at least 4, so this is the next one. For these two kittens I decided to choose an outdoor setting to stretch my skill at doing backgrounds.
I have made myself a practice book to try out individual background elements. A normal sketchbook would not be much use to me as I am mainly working on drafting film, so I cut up sheets of drafting film, bristol board and Arches Hot Press Watercolour paper and made my own. These are the surfaces I mainly use, depending on whether I am working in acrylic, graphite or coloured pencil.
My artist friend Katherine Tyrell (have a look at her blog, Making A Mark, link at the left) came for a visit and gave me loads of good advice which I hope I'm putting into practice in this piece.

Here are some progress shots.


I might need to fade out the background trees at the end but I have discovered another drafting film plus, blue tac easily lifts the colour.

Thursday, April 13, 2006

The Final stages of the Norwegian Forest Cat

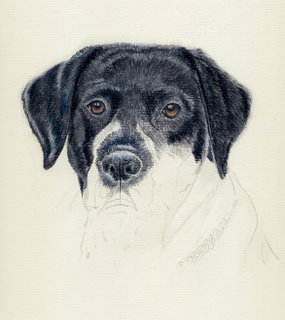
Poppy the Labrador is now finished and hanging on her owners wall, I didn't get chance to take a final photograph but her owners were pleased with the portrait.

Here are the final stages in the Norwegian Forest Cat on drafting film.
I am very impressed with the drafting film as a surface to use coloured pencils on, so far it has done everything I wanted.


The final shot is the finished print.

Friday, April 07, 2006

Step by Step Cat on Drafting Film

For people who have never used drafting film, it is an exciting surface to try with coloured pencils.
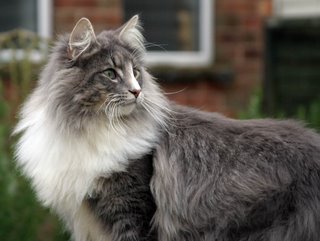
This is how I am working with it to produce a painting of a Ch. Norwegion Forest Cat belonging to our friends John and Caroline Tipper. John and Caroline own and breed the Tiganlea Norwegian Forest Cats and Rough Collies

I am using double matt Polydraw, which means I can work on both sides, a variety of coloured pencils including Polychromos, Lyra, Derwent and Prismacolor and possibly some acrylic.
After selecting the photograph I wanted to use, (out of a couple of hundred I took on my visit) I drew out an outline on rough paper, I then traced this onto the drafting film using a sharp white Polychromos pencil with heavy pressure. One of the advantages of drafting film is that you can erase coloured pencil completely without damaging the surface so the pressure doesn't matter, I simply press on hard so that I can see the lines at a later stage.
I want to completely change the background to put the cat in a more interesting setting and to give him something to look at, so I am going to introduce a Bee into one of the 'sweet spots' in the painting.
My artist friend Katherine Tyrrell provided me with a wonderful photograph of pink flowers growing against a lovely warm wall. So I am going to take elements of that to complete my background.
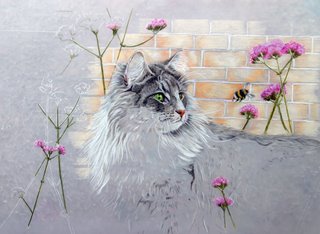
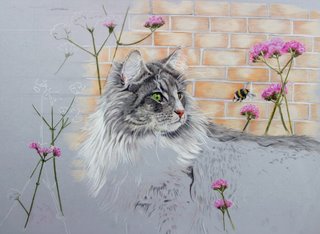
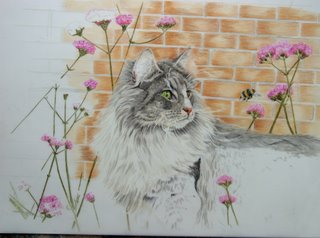
The next photographs show the development of the painting.

Because drafting film is semi transparent I put a mid toned piece of mount/matte board behind it while I work so that I can see the colours I'm using clearly.
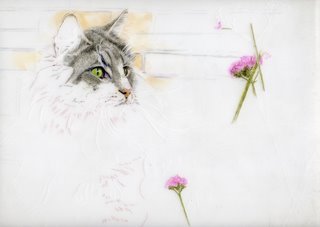
I have started with the cat's head, really to give me a starting point, and as I've previously mentioned I like to do the eye first, because even at this early stage it brings the painting to life. I also put one flower in to see if the colours worked together.
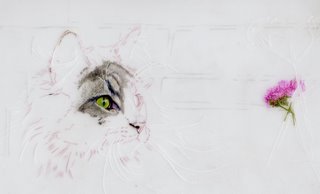
On the next scan, I have started to put the wall in to ensure that the colour, tone etc compliment the cat. For the wall, I am working on the back of the film to start with, which means it gives a softer effect and I can overlap the edges of the fur without damaging my work on the front. I can then adjust or darken on the front of the film at a later stage. I will continue working the painting as a whole now and will scan when there is a little more to see.


Saturday, April 01, 2006

Where do you draw the Line?

Where do I draw the line?, preferably I don't, at least not on the final surface for my drawing/painting.
I'm defining a line here, as a mark that divides and separates two areas, and in a painting how does that sit with the unified whole.
I had a 'lightbulb' moment while I was drawing Poppy and thinking about her bone structure, I finally realised I should be thinking about masses of colour, tone etc rather than drawing a line and working away from it. Now, if you're shaking your head at my late understanding of a rather basic concept, I perhaps need to add, I did know that there are no lines in nature, I just wasn't applying it.
I am not suggesting I could draw a pet portrait without guide lines because I couldn't, but once my rough drawing is transferred to my final surface then I am going to try to erase the lines to faint suggestions and work in masses. As an example from my own work, I have always defined an animal eye with a hard, black,blue, or brown line. In future I will try to use tiny strokes following the curve of the eyeball to create mass rather than a defined line.
This will become even more important as I continue to move away from pure portraits towards my long term aim of painting animals in scenes. I hope this small step will help my paintings to become much more unified.

Poppy is moving on nicely, I am still working mainly undercoat with pastel pencils and hard pastel sticks. The best bit will be when I add the really soft pastels to hopefully make the painting sparkle.