
In order to correct anatomy, I find the easiest way is to use a grid for the parts I'm not sure about. The rest of the reference I can draw freehand, but using a grid helps me keep everything else constant while I alter certain parts.
I start by adding the grid lines to my reference photograph.
I have created a new pattern in Photoshop in order to do this and I add my custom pattern to the photograph as a new layer.

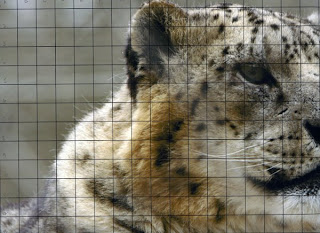
This is the complete photograph gridded out, I could have altered the grid using the transform function to just cover the features, but as I can quite clearly see under the grid lines I decided not to bother.
I then print the photograph out, size doesn't matter although I always like large reference material, so I printed an A3 version. When I start drawing I use the photograph on my laptop so that I can enlarge/lighten etc parts of the photograph as needed. This helps greatly when drawing the features.
The next photograph shows part of the image with the squares labelled with a letter and number in pencil.
I will next draw a grid on my paper, in this case I am using a heavyweight Fabriano Artistico hot press paper, 640gms.
In my next post I'll show you the adjustments I make with the drawing.
1 comment:
Maybe do a step-by-step tutorial about how to do this?
Post a Comment